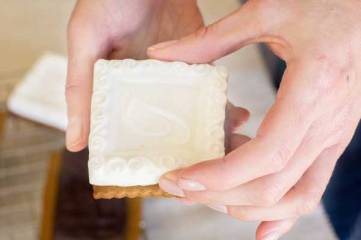
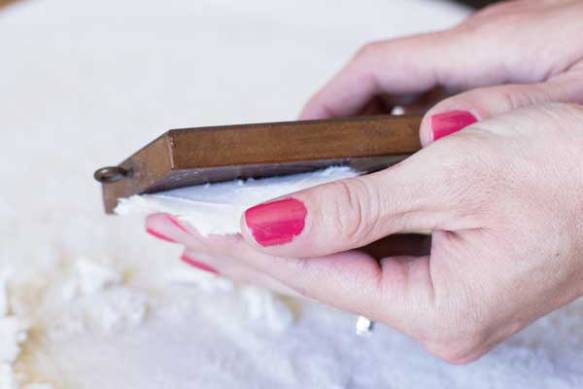
The Springerle Series: Chocolate and Fondant Cookie Toppers

toppers9

Guest Post by Fancy Flours Employee Lindsey K.

Welcome back to the third installment of our Springerle Series! This post will cover three mediums that you can use to top cookies in beautiful molded designs – modeling chocolate, fondant and marzipan. This is a super quick and easy way to take your cookies to the next level for wedding favors, birthdays, holiday gifts or just a sweet treat for a special someone.

If you missed our previous posts on how to craft with Springerle molds, see them here: Casting and Papercasting. As a quick review, Springerle cookies have been used to depict everything from biblical images to daily life since the 16th century. While the molds were originally used to make dense, cake-like cookies (see our recipe here!), they have advanced to be useful in crafting as well.

Our molds are made by House on the Hill of an heirloom quality wood and composite mix. Most of their images are casts of vintage molds and others are of their own design.

Before making our toppers for this tutorial, we pre-made cookies using our Gingerbread recipe. This recipe is fabulous for not only its taste, but for holding its shape. You could also use our No-Fail Sugar Cookie Recipe. We took note of the sizes of our molds and used cutters to make cookies just slightly larger.

We also pre-made our modeling chocolate, which is a surprisingly simple recipe from House on the Hill. You can also buy chocolate-flavored, white or colored fondant at most craft and baking stores. Or if you prefer to make your own, here’s a recipe from Allrecipes! And for you sweet almond lovers, you can simply use Marzipan from your grocery store.

I will show images using both the modeling chocolate (in brown) and fondant (in white). If you choose to use marzipan, you will follow the fondant instructions.

Ingredients/ Utensils

  • Modeling chocolate, fondant or marzipan
  • Cocoa powder (if using modeling chocolate)
  • Powdered sugar (if using fondant or marzipan)
  • Corn Syrup
  • Springerle mold
  • Cookies cut and baked in the shape of your mold
  • 2 Pastry brushes
  • Spatula
  • Small dish (for cocoa powder or powdered sugar)
  • Cooling rack (if using modeling chocolate)
  • Pastry prep mat (optional)
  • Luster or disco dust (optional)
  • Small food-safe paint brush (optional)

Directions

1. Workspace prep: On a flat surface, lay down your Pastry Prep Mat or wax paper to protect your surface and keep your area clean. Fill a small dish with your dusting powder (either cocoa or powdered sugar) and set near your pastry mat with a clean, dry pastry brush. Set your modeling chocolate, fondant or marzipan in a bowl near your space for easy access. Set out your cooling racks if using modeling chocolate.

toppers1

2. Dip your pastry brush in cocoa (for chocolate) or powdered sugar (for fondant or marzipan) and dust your Springerle mold so it has an thick, even coating throughout the design. The pastry brush is great for this as it won’t clog up the deeper areas.

3. Lay your dusted mold face up on your pastry mat. Pull a ball of your topper medium from the bowl. It will need to be enough to fill the mold and a little extra to go over the edges.

Fancy tip: Your modeling chocolate should be the consistency of Play-Doh or perhaps even a touch harder. If it seems too soft or is sticking in your mold, flatten the ball into a pancake and refrigerate for 5-10 minutes.

toppers3

4. Using your hands, press your medium into the mold. Be sure to push firmly to fill the deeper parts of the design.

5. When you feel the mold is adequately filled, flatten the back of your medium with a spatula. Press the topping to be quite thin unless you love a lot of chocolate or fondant on your cookies. 🙂

Fancy tip: If your spatula is sticking to your chocolate or fondant, dust with cocoa or powdered sugar, respectively.

6. Turn your Springerle mold upside down with your medium still in it. Use gravity (and some light taps on the table) to release it. Release time may be longer for deeper molds.

7. Trim any extra with a knife or spatula and return to your bowl for re-use. You could also use a cookie cutter sized to your mold (we have many available here).

toppers7

8. For modeling chocolate only: Set your finished topper on a cooling rack to dry until firm (approximately 2 hours). You can make these ahead of time and keep in an airtight container at room temperature for up to 1 month.

toppers8

9. Repeat steps 2-8 for as many toppers as you need. Be sure to dust the mold before every press for all options.

toppers9

10. To adhere the toppers to your cookies, brush a thin layer of corn syrup on the back of your topper and set on your cookie. Let dry for at least 10 minutes.

11. For a fancy touch, “paint” your topper with luster dust. You will not need to mix the luster dust with anything for this project. It should stick directly onto your medium. We used Super Green and Old Gold. See all our Luster and Disco Dust colors here!

toppers11

Display in a cute container for decoration or wrap in a simple polypropylene bag with a ribbon to hand out to friends and family. To create the snow effect on our Pinewood Cabin cookie, I dusted it with powdered sugar instead of the cocoa.
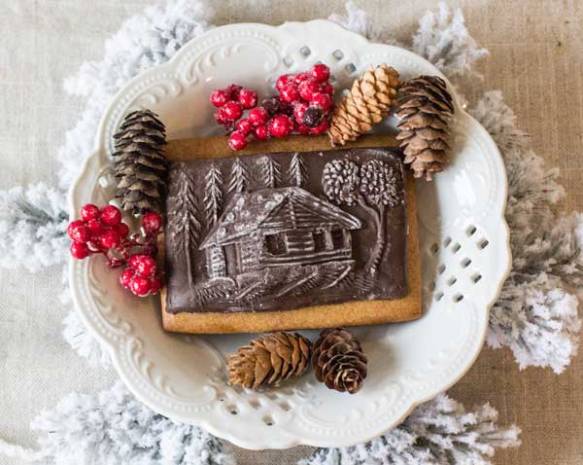
toppers12-pinewood

Molds shown in this tutorial are Tree on Table, Monogram F, Pinewood Cabin and Snowman.

toppersfinished

We would love to see your projects. What did you make your toppers for? Show us in the comments or send an email to info@fancyflours.com!

The Springerle Series: Papercasting


Honey-jars-complete

By Fancy Flours Employee Lindsey K.

Welcome back for our second tutorial in the Springerle series! We’ll be covering how to make a papercast using our beautiful House on the Hill molds. Papercasts have so many uses. Put them on cards, use them as tags, wall décor, ornaments… or wrap honey jars to make a personalized gift as we’ll show you today.

Missed our first post where we made Paperclay ornaments? See it here! You’ll also get a quick history of what a Springerle is.

We used cotton linters from Arnold Grummer, who specializes in paper supplies. Their linters are non-toxic so you can feel safe going from cookies to papercasts and back! Grummer has pages of ideas and a papercasting video that is very helpful for our visual learners.

And now let’s make these adorable jar wrappers!

Materials:

  • Cotton Linters (we found ours from Arnold Grummer)
  • Springerle Mold (see all our available molds here!)
  • Water
  • Blender
  • Medium Bowl
  • Fine Mesh Strainer
  • Sponge
  • Towel
  • Drying Rack
  • Ribbon
  • Hot Glue Gun
  • Black Tea Bags (optional)
  • Colored Tissue Paper (optional)
  • Glitter (optional)
  • Colored Pencils (optional)

Instructions:

1. Fill your blender about 3/4 full of water.

For the darkened ivory effect shown in our tutorial: Use hot water, add two tea bags and let them steep for 4 minutes. The linters will dry slightly darker using the tea method than they appear when wet.

For color: Add colored tissue paper after you put in your linters (step 2). Start with small strips and blend. Add more until your desired shade is reached. Only use the tissue paper since it has paper dyes. Do not use other colorants. You can also add glitter for some subtle sparkle at this stage.

Tea-bags-in-blender

2. Remove the tea bags if you used them. Put a handful of paper linters into the blender and purée until it becomes a pulp.

3. Place your mesh strainer into the bowl. Pour a “pancake” of pulp into the strainer using a continuous, circular pouring motion. Make the pancake as big as your design. This saves you from having to reshape after the fact.

Tip: If the pulp isn’t coming out easily, you can add more water to the blender and re-pour.

Pouring-linters

4. Prep your workspace by placing a towel down. Have the sponge and drying rack within arm’s reach.

5. Dump the pulp from the strainer into your open, flat hand. Lightly press the pulp to remove some of the water, but you still want it to be very wet at this point. After pressing, plop the pulp onto the mold so it covers the whole design. (No need to coat the mold with a release agent). If you need more pulp, simply place it back in the strainer and pour more onto it from the blender. We used the Bee Skep for our honey jars.

6. Using the sponge, press out as much water from the  pulp as you can.

Sponging

7. Using a corner of the towel you’ve laid down, press the rest of the water out. Keep moving the towel to a dry spot as you press so that you can tell when most of the water has been extracted.

Tip: Make sure to press deeper parts of the design harder. For example, the bee’s abdomen. For particularly detailed spots, use your fingers to press the pulp into it.

Toweling

8. “Deckle” the edges by placing your thumb along the edge of the design and pulling off the extra with your fingers or tweezers. This gives a fun, home-made look, but you can also use scissors after the mold is dry to create a clean edge.

Deckling

9. Pick up the mold and turn it upside down. Gravity will be your aid. Lightly pull away all edges and carefully remove the cast.

Tip: If you’re unhappy with your cast, just toss it back in the blender and begin again!

Removing-cast

10. Place your papercast on the drying rack and let dry 12-24 hours (depending on humidity). You can make as many casts as you have pulp in your blender by returning the poured water right back into it. The water will last 3-4 more handfuls of linters before needing to be replaced.

Finished-bee

11. If you plan to color your casts, now is the time! After they’re dry, you can use acrylic paint, colored pencils or thin markers. We used colored pencils for this Cornucopia design.

Cornucopia-ring-three

12. Now back to our little bee! Gather your hot glue gun, honey jars, dried papercast and desired ribbon cut to the diameter of your jars. I put down aluminum foil and parchment paper to protect my work surface from the hot glue.

Honey-jars-craft-table

13. Using the hot glue gun, attach your papercast to the center of your ribbon.

Gluing-ribbon

14. Once that cools, wrap the ribbon and papercast around the jar and glue the two ends of the ribbon to each other.

15. Ta da! You’ve created a sweet personalized gift!

Honey-jars-complete

While I was at it, I made these cute napkin rings using the same method of attaching the cast to a ribbon.

Cornucopia-ring-on-plate

Owner of House on the Hill, Connie Meisinger, created several other beautiful papercasts. Here they are for a bit of inspiration.

This slideshow requires JavaScript.

Slide 1: Pine Cone Card

Slide 2: These molds have retired, but we have a beautiful grape mold for your wine gifts in our Taste of Switzerland Set.

Slide 3: Gift tags of Fireworks, Pine Cone, Santafest and Snowman

Slide 4: Deep Santa Card

Slide 5: Bee made and colored with markers by our own Fancy Flours employee, Patty!


Show us what you’ve created! We would love to see your work either by email at info@fancyflours.com or in the comments below.